


If you’ve been looking for a fun, simple craft project that doubles as a personalized gift, this DIY beaded necklace is a winner.
Using colorful seed beads and alphabet beads, you can create a necklace that spells out a name, nickname, or sweet phrase like “Bestie,” “Mama,” or “I Love You.”
Not only is this craft beginner-friendly and inexpensive, it’s also fantastic for kids.
Stringing beads is a wonderful fine motor skill activity, giving little fingers practice in coordination, pattern-making, and concentration.
The end result is a necklace that feels meaningful and handmade, perfect for gifting to a loved one or keeping as a personal treasure.
Whether you’re a parent planning an afternoon activity, a teacher searching for a group project, or just someone who loves making thoughtful handmade gifts, this tutorial will walk you through everything you need to know.
keep readINg for the DIY Beaded Necklace TUToRiaL

Supplies You’ll Need
One of the best parts about this project is how accessible the materials are. You can find all of these at most craft stores or online, and many can be mixed and matched depending on the look you want.
Supply List:
- Elastic beading cord (don't waste your time with anything except this elastic)
- Seed beads (I used size 6/0 seed beads)
- Alphabet beads (I love these letter beads)
- Scissors
- Clear jewelry glue or nail polish (optional, to secure knots)
- Small tray or dish (to keep beads from rolling away)
Optional: Add in special beads like hearts, stars, or charms to give your necklace extra flair.

Step-by-Step Tutorial
Step 1: Plan Your Design
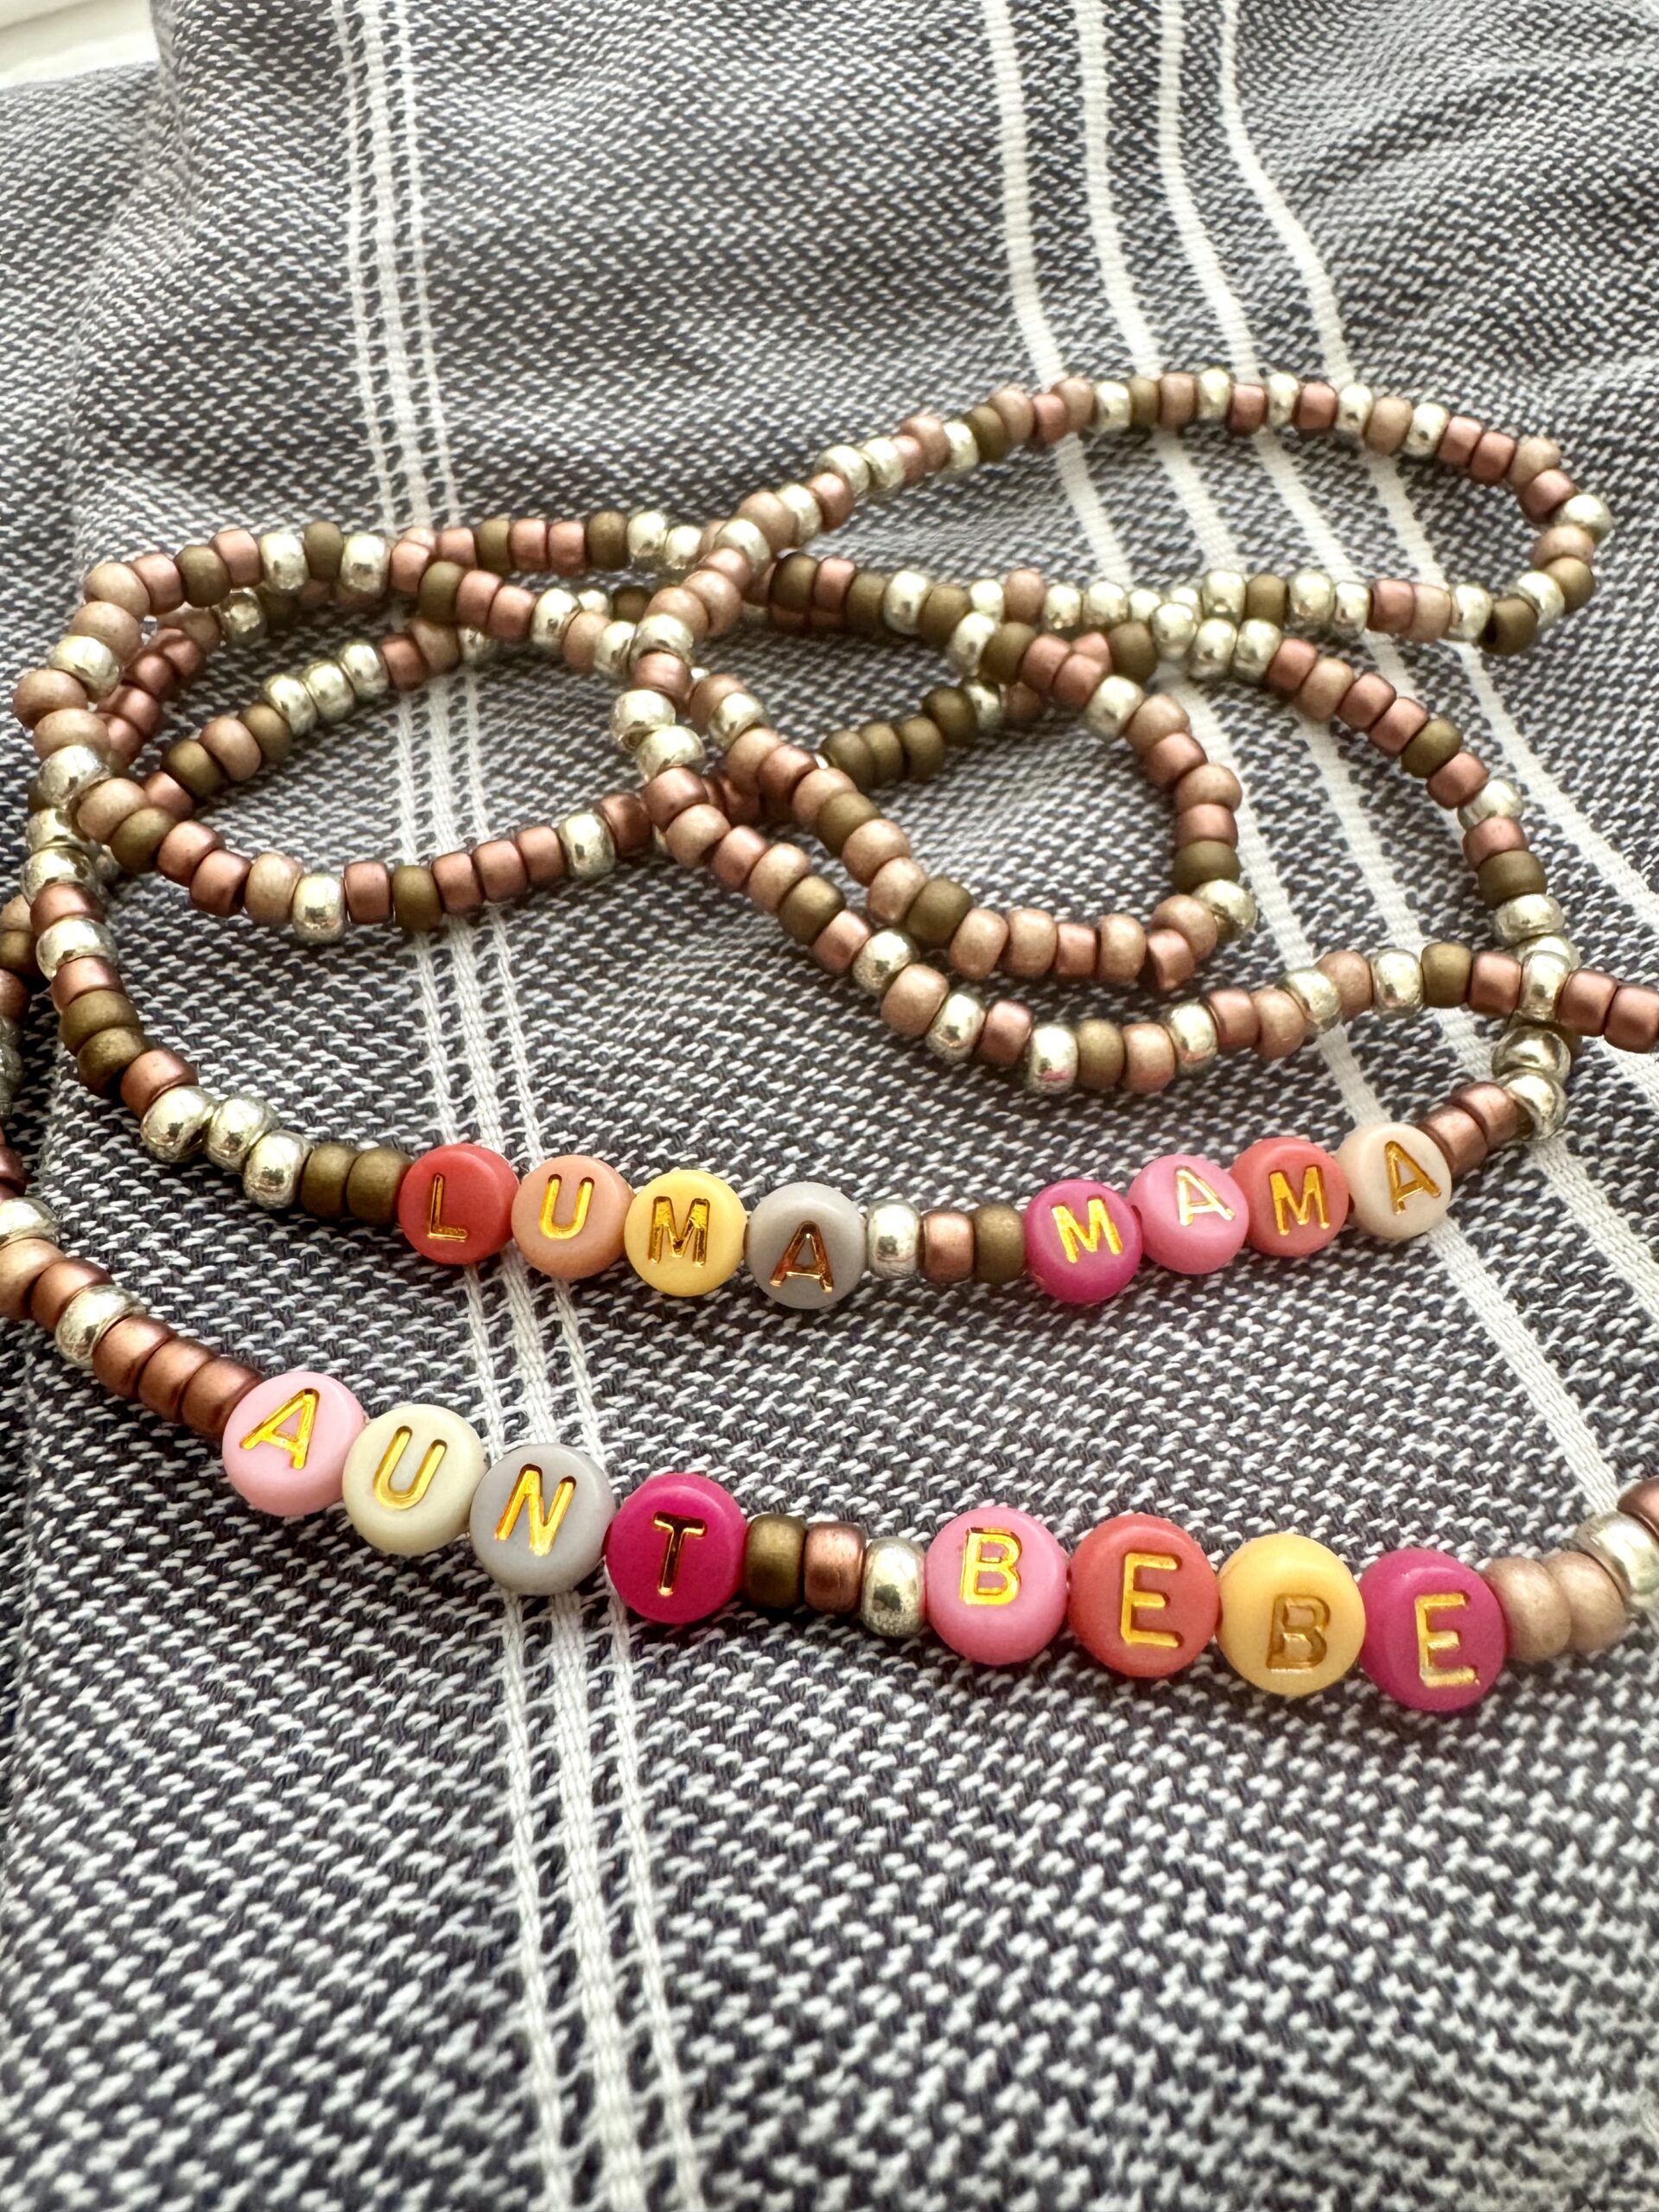
Start by deciding on the word or name you want to feature with your alphabet beads.
It could be someone’s name (“Aunt Bebe”), a sweet phrase (“Luma Mama”), or even an inspirational word (“Shine”).
Once you know the word, lay out your beads in the order you’d like them to appear.
Add seed beads around the letters to create patterns. Think stripes, rainbow color order, or alternating designs.
Step 2: Measure and Cut
Wrap the elastic cord loosely around your neck to get a sense of how long you want the necklace to be.
Add a couple of extra inches to make tying easier. Cut the cord with scissors.
Step 3: String the Beads
Here comes the fun (and fine motor practice!).
First, tie a loose knot at one end so the beads don't slip off. Start sliding the beads onto your elastic cord from the other end.
Kids will love practicing their pincer grip as they pick up tiny seed beads, and adults can get creative with color arrangements.
If you are stringing beads without kids, consider using a fine needle to load the beads onto the string faster. (For safety reasons, I do not recommend using a needle with a young child.)
When it’s time for your word or name, slide the alphabet beads into place.
Double-check the spelling as you go!
Step 4: Finish and Tie
Once your design is complete, bring the two ends of the elastic cord together and tie a secure knot.
A surgeon’s knot (a double knot with an extra loop) works best.
For extra security, dab a touch of clear jewelry glue or nail polish on the knot. Trim off any excess elastic. The knot should slip inside the hole of a bead so it's not visible.
Step 5: Wear or Gift
Your personalized necklace is ready to wear! Or, tuck it into a little jewelry pouch or handmade card and give it to someone special.

Why This Craft is Great for Kids
This project isn’t just about making something pretty—it’s also a sneaky way to help kids practice important developmental skills:
- Fine motor skills: Picking up and threading tiny beads strengthens finger muscles and coordination.
- Hand-eye coordination: Kids must carefully line up the bead hole with the elastic cord.
- Focus and patience: Beading requires concentration and planning, especially when creating color patterns.
- Spelling practice: Using alphabet beads helps younger children practice letter recognition and spelling their own names or words.
It’s a craft that checks both the fun and educational boxes, which is always a parenting win.

Personalization Ideas
The real charm of this DIY beaded necklace lies in how customizable it is. A few fun ways to make it extra special:
- Names & Nicknames: Spell out a child’s name, or a family nickname like “Mama Bear” or “Baba.”
- Special Dates: Use number beads to mark a birthday, anniversary, or graduation year.
- Affirmations: Words like “Brave,” or “Sparkle” make uplifting, wearable reminders.
- Friendship Sets: Make matching necklaces with your kids’ best friends or cousins.
Every necklace tells a little story, and the recipient will love that it was made just for them.

A Thoughtful Handmade Gift
Handmade gifts carry a special kind of magic. When you make a DIY beaded necklace with alphabet beads, you’re giving more than just jewelry—you’re giving a personalized keepsake that says, “I thought of you.”
These necklaces make perfect gifts for:
- Mother’s Day or Father’s Day (“Best Mom” or “Dad Rocks”)
- Birthdays
- Teacher appreciation (“#1 Teacher”)
- Holidays
- Bridal showers
- Graduations
- Just-because surprises
Pair the necklace with a handwritten card and you’ve got a thoughtful, budget-friendly gift that feels extra meaningful.
Tips for Success
- Use a bead tray or muffin tin to keep beads from scattering.
- Pre-cut cords for kids so they can jump straight into beading.
- Double-check bead hole sizes before you buy—some alphabet beads have smaller holes, so make sure your elastic cord fits.
- Encourage creativity: Let kids mix colors, patterns, and letters however they like.
The Joy of Handmade
Making a DIY beaded necklace with seed beads and alphabet beads is the perfect blend of fun, creativity, and meaning. It’s an easy craft for beginners, a great activity for kids that builds fine motor skills, and a heartfelt handmade gift for loved ones.
So next time you need a rainy-day project or a special gift idea, grab some beads and elastic cord—you’ll be amazed at how much joy comes from a simple string of beads.
ENJOY MAKING YOUR DIY BEADED NECKLACE!

Want more simple DIY projects?
MORE POSTS YOU'LL LOVE

This post may contain affiliate links, which means I'll receive a small commission if you purchase through my link. Read the full disclosure.


