


I’ve spent the past few years perfecting how to make an ice cream cake that’s always creamy, crunchy, and incredibly delicious.
I’m always a little in awe of how much people respond to this cake—it’s the one dessert everyone raves about and asks for again.
What I love most about ice cream cakes is that you can make them a week in advance—no stress about frosting or baking the day or two before a celebration.
Plus, while traditional cake flavors can feel limiting, everyone has a favorite ice cream flavor, which means you can truly personalize a cake for someone special.
KEEP READING TO LEARN HOW TO MAKE AN ICE CREAM CAKE

My Favorite Ice Cream Cake IngredientS
- Salt & Straw ice cream – I always make one layer an incredible, artisan flavor. My favorite is Salt & Straw's Love Nuts flavor: coffee with candied pecans layered with 14 coats of chocolate. The texture is unbeatable.
- Cookies and cream ice cream – the cookie texture pairs beautifully with the Love Nuts texture.
- Brownie layer – bake it ahead and freeze so it’s ready to go. (I’m obsessed with this organic brownie mix—it makes the best base layer!)
- Chewy chocolate chip cookies – baking a thick cookie layer (like the brownie) makes it too hard to bite once frozen. I use this chocolate chip cookie recipe and underbake them by a few minutes so they stay soft and chewy. Then I break them into pieces to create the cookie layer of the cake.
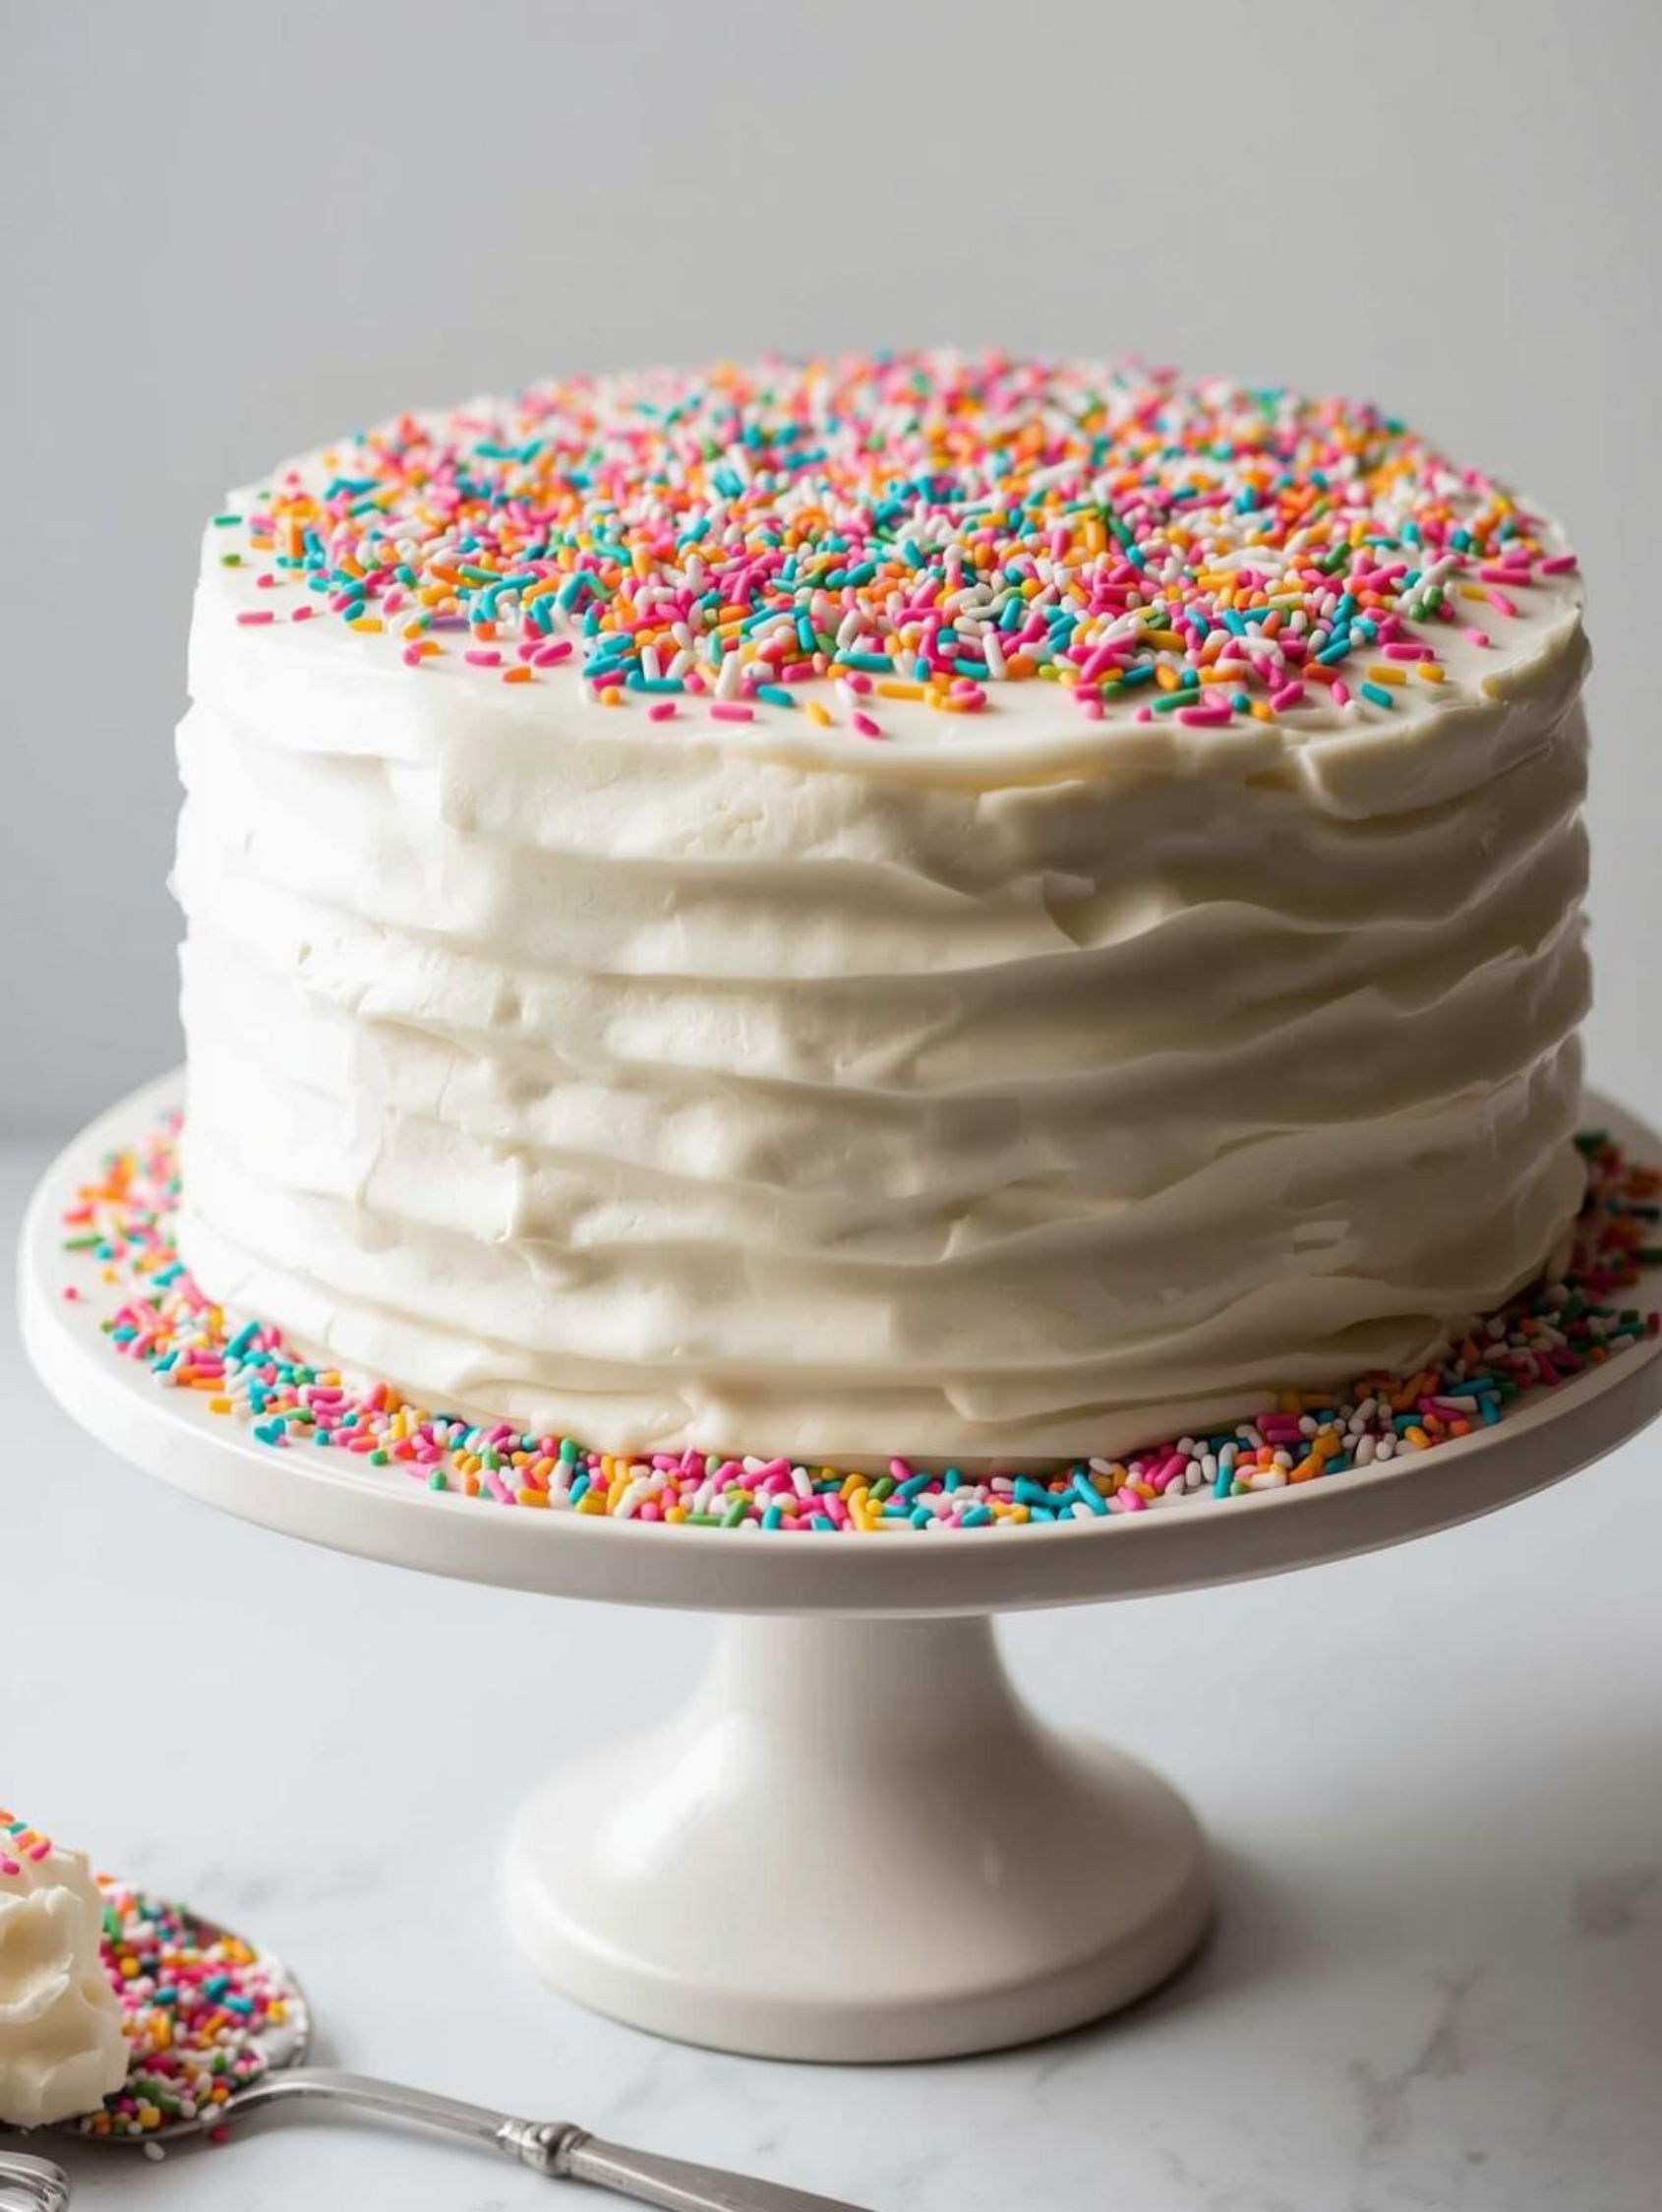
- Homemade whipped cream – for frosting, I use a pint of heavy cream, a splash of vanilla extract, and a few tablespoons of sugar, whipped in my KitchenAid until fluffy. Traditional frosting is just too sweet with ice cream, in my opinion!
- Rainbow sprinkles – colorful and fun for the top!
OTHER Ice Cream cake flavor ideas
Ice cream cakes are endlessly customizable, and pairing the right baked layer with the ice cream creates a delicious flavor combination. Here are some other combinations to try:
Classic & Crowd-Pleasing
- Cookies & Cream + Fudge Brownie – Layers of cookies and cream ice cream, brownie, crushed Oreos, and a drizzle of chocolate fudge on top.
- Mint Chip + Chocolate – Mint chip and chocolate ice cream layers with a brownie base and chocolate cake layer, topped with chopped Andes mints.
- Neapolitan Dream – Strawberry and vanilla ice creams with chocolate brownie layers, finished with chocolate sprinkles.
- Rocky Road Delight – Chocolate ice cream layered with marshmallows, almonds, and pretzels, topped with dark chocolate curls.
Fresh & Fruity
- Strawberry Shortcake – Vanilla and strawberry ice creams with a sugar cookie layer, yellow cake layer, and fresh strawberry slices.
- Lemon Raspberry – Lemon ice cream and raspberry sorbet layered with vanilla wafer cookies.
- Tropical Escape – Coconut ice cream and mango sorbet with alternating yellow cake and coconut cake layers.
Gourmet & Grown-Up
- Coffee Toffee Crunch – Coffee ice cream swirled with toffee pieces, layered between biscotti and chocolate cookie crumbs.
- Salted Caramel Pretzel – Salted caramel ice cream with a crushed pretzel layer and rich chocolate ganache drizzle.
- Black Forest – Chocolate and cherry ice creams with chocolate cake and fudge brownie layers, topped with maraschino cherries.
- Pistachio Almond – Pistachio ice cream layered with macaron cookie pieces and almond cake.
Fun for Kids (and Kids at Heart)
- Birthday Cake Explosion – Cake batter ice cream and rainbow sprinkles layered with yellow cake and sugar cookies.
- Peanut Butter Cup Dream – Chocolate and peanut butter ice creams with a brownie base and chopped Reese’s layer.
- S’mores – Chocolate and toasted marshmallow ice creams with graham cracker cookie and brownie layers, topped with a fudge drizzle.
- Cookies & Cookie Dough – Cookies and cream and cookie dough ice creams with chewy cookie pieces between each layer.

ICE CREAM CAKE EQUIPMENT THAT COMES IN HANDY
You don’t need anything fancy to make a beautiful ice cream cake, but a few basic tools make the whole process so much smoother (and way less messy!)
- Four 8- or 9-inch cake pans – perfect for baking brownies, cakes, or cookie layers
- Cake spinner or turntable – makes frosting a breeze
- Cake round – your sturdy foundation for layering
- Cake box – a must for freezing and transporting without disaster
- Cake stand – because presentation matters!
- Offset spatula – for smooth, dreamy frosting
- Cake spatula – for slicing perfect pieces without a mess
STEP-BY-STEP How to make a homemade ice cream cake
1. Prep two round pans
Line two 8- or 9-inch round pans with plastic wrap. This makes it super easy to remove the ice cream layers later—just lift the edges of the plastic, and the frozen layer pops right out.
2. LET THE ICE CREAM SOFTEN
Leave the ice cream out for 10–20 minutes to soften slightly before spreading.
3. Create the ice cream layers
Spread the ice cream evenly into each lined pan. I usually use two to three pints of the artisan flavor in one pan and about a half-gallon of vanilla or cookies and cream in the other.
Cover each pan with aluminum foil and place them flat in the freezer.
4. MAKE THE BAKED LAYERS
For brownies or cake (or similar) bake the layer in an 8- or 9-inch pan, let cool, then wrap in aluminum foil and freeze.
For cookies, go for chewy—not crispy. Chewy cookies stay soft and easy to bite when frozen, while crispy ones turn rock-hard. When assembling, arrange the cookies to form a full layer, breaking them into pieces as needed to fill in any gaps.
5. ASSEMBLE THE CAKE
What I love most about an ice cream cake is that it’s more assembling than baking—so much less stress than making a traditional cake!
Start by smearing a little whipped cream frosting in the center of your cake round. It acts like glue and keeps your first layer from sliding around while you build.
Then layer it up in this order:
- Brownie (or whatever baked layer you’re using)
- Ice cream
- Cookie layer
- Ice cream again
Once everything’s stacked, pop the whole thing into a cake box and freeze for at least an hour before frosting.
6. Frost the cake
Spread the homemade whipped cream over the frozen layers—work quickly to keep everything from melting! Add colorful sprinkles or any decorations you like.
Then pop it back into the cake box and freeze for at least another hour to set.
The best part? You can do all of this days—even a full week—before your celebration. No more baking a cake the night before and worrying if it’ll dry out. Ice cream cake for life, here!

Tips for Success
- Make sure at least one of the ice cream flavors has mix-ins (like nuts, toffee, or cookie chunks). It adds texture and interest to every bite.
- Let the cake sit for 5 minutes at room temperature before slicing if it’s very hard.
- Use a very sharp knife for cutting; warm it under hot water and dry before slicing.
- Thin slices can wreck the layers, so go for thicker cuts.
- Don’t attempt a small 6-inch round ice cream cake; it doesn’t cut well.
- Freeze all components ahead of time for easier assembly.
- For extra flair, drizzle chocolate ganache or caramel over the whipped cream just before serving.
- Personalize flavors by pairing favorite ice creams with complementary baked layers—everyone loves a cake that feels custom-made just for them.
There’s something truly special about an ice cream cake you’ve layered and customized yourself.
Each bite combines the flavors and textures you love most, and sharing it with someone makes the moment feel extra memorable.
It’s not just dessert—it’s a celebration of the little things that bring joy, a treat that makes the person you’re serving feel cherished, seen, and a little spoiled.
And the best part? You can make it days in advance, so the magic—and all the joy of seeing smiles when it’s served—happens stress-free.
ENJOY MAKING A DELICIOUS ICE CREAM CAKE!
MORE POSTS YOU'LL LOVE
This post may contain affiliate links, which means I'll receive a small commission if you purchase through my link. Read the full disclosure.


