


One of the easiest and most enchanting ways to capture the magic of the fall season with your kids is through leaf rubbing art.
This simple craft is perfect for kids of all ages (and adults too!), and it requires just a few craft supplies you likely already have at home.
Whether you’re looking for an engaging weekend project, a nature-inspired homeschool activity, or just a fun way to slow down and celebrate the beauty of the season, leaf rubbings are the perfect blend of creativity and learning.
Check out the simple leaf rubbing step-by-step tutorial below!
KEEP READING TO LeARN aLL ABOUT LeAF RUBBING ART

KEEP READING TO LeARN aLL ABOUT LeAF RUBBING ART
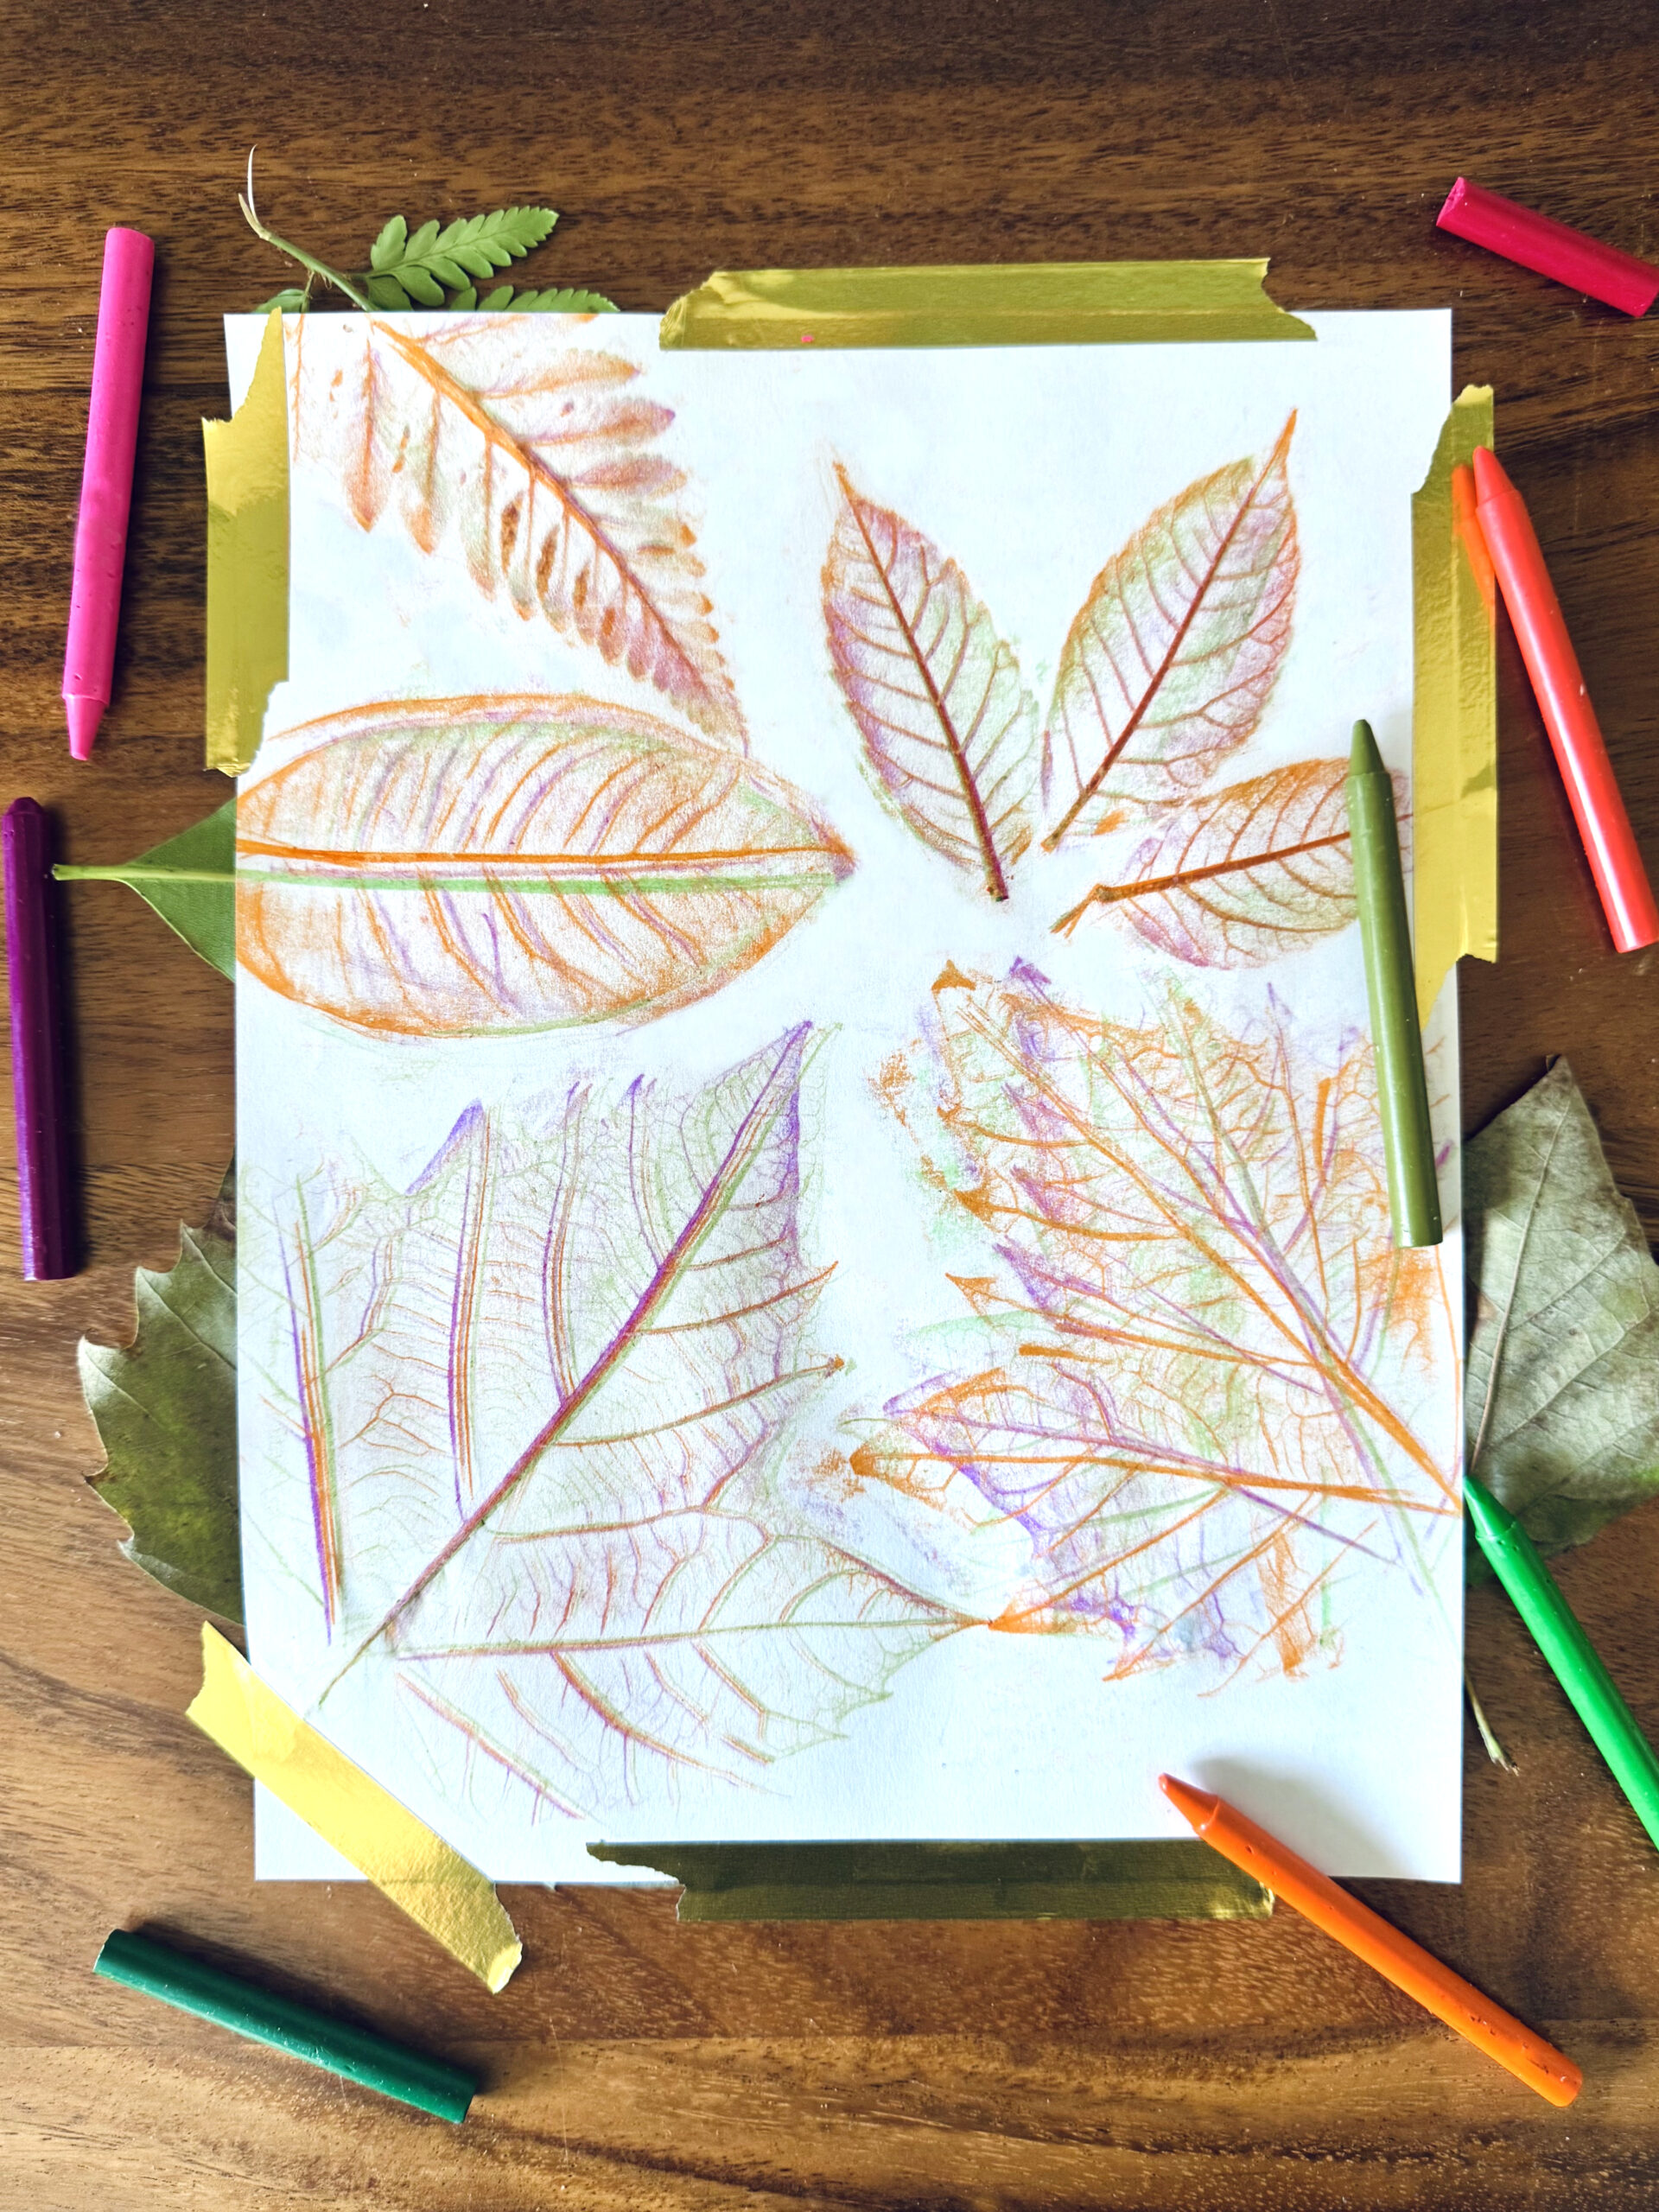
Leaf rubbing art is created by placing a leaf under a piece of paper and gently rubbing over it with a crayon, colored pencil, or pastel.
The texture of the leaf—its veins, stem, and unique shape—transfers onto the paper, creating a natural imprint.
Kids are always amazed to see the “hidden details” appear as they rub, almost like a secret design revealing itself!
Not only is it fun, but this craft also helps children:
- Develop fine motor skills while rubbing and coloring.
- Learn about nature by studying leaf shapes, veins, and textures.
- Express creativity by experimenting with colors, layers, and patterns.

Supplies You’ll Need
One of the best things about leaf rubbing art is how little you need to get started. Here’s what to gather:
- Leaves – Look for fresh, flat leaves with visible veins. Maple, oak, sycamore, and ferns work especially well.
- Paper – White printer paper works fine, but you can also try colored construction paper.
- Crayons or Colored Pencils – Peel the paper wrapper off crayons so kids can use the side for smooth rubbing.
- Optional extras – Oil pastels, watercolor paints, scissors, glue, and cardstock (if you want to turn the rubbings into additional projects).

Does Your Child Love Nibbling on Crayons?
Here's a simple solution: Honeysticks!
Try these non-toxic crayons for kids, made out of 100% pure beeswax and food-grade colors. They're unbreakable, extra-large, and easy to hold.
Step-by-Step Tutorial for Kids
Here’s a simple guide you can follow with your kids:
Step 1: Collect Leaves
Head outside for a leaf hunt!
Encourage kids to look for a variety of shapes and sizes.
Try to find leaves that aren’t too crunchy or brittle, since those can crumble during rubbing.
Freshly fallen leaves or ones picked right from a tree (with permission) work best.
Step 2: Set Up Your Workspace
Place your leaf on a flat surface with the veiny side facing up.
Lay a piece of paper gently on top of it.
Step 3: Choose Your Crayon
Peel the paper wrapper off the crayon, then hold it sideways.
This helps the color glide smoothly across the paper and pick up the texture of the leaf.
Step 4: Start Rubbing
Rub the crayon gently across the paper.
Watch as the shape of the leaf magically appears!
Younger kids may need help holding the paper still while they rub.
Step 5: Experiment With Colors
Try layering different colors on one leaf for a rainbow effect, or use realistic fall shades like red, orange, yellow, and brown.
Kids can also overlap multiple leaves to make a collage.
Step 6: Display Your Art
Once finished, hang the rubbings on the fridge, turn them into cards, or glue them into a nature journal.

Creative Ways to Use Leaf Rubbings
The beauty of this craft is how versatile it is. Once kids get the hang of it, you can take the project in so many directions. Here are some fun variations:
1. Rainbow Leaf Collage
Make a big sheet filled with overlapping leaf rubbings in every color of the rainbow. This creates a bold, abstract piece that looks amazing framed or displayed on a bulletin board.
2. Leaf Rubbing Garland
Cut out your leaf rubbings, punch a small hole at the top, and string them together with twine to make a festive garland. Perfect for fall decorating!
3. Leaf Rubbing Cards
Fold a piece of cardstock in half, add a leaf rubbing on the front, and write a message inside. Kids can give these as thank-you notes, fall birthday cards, or even Thanksgiving place cards.
4. Watercolor Resist
First, make your leaf rubbings with a white crayon on thick paper. Then, paint over the paper with watercolor paints. The leaf shapes will “resist” the paint and pop through in a magical way.
5. Nature Journals
Encourage kids to make rubbings of leaves they find throughout the seasons and keep them in a special notebook. They can label each leaf, note where they found it, and even press the real leaf next to their rubbing.
6. Leaf Rubbing Animals
Challenge kids to use leaf rubbings as building blocks for pictures—like using a big leaf as a fish body, a fern as feathers, or a cluster of small leaves as a lion’s mane. Glue them into place and add details with markers.
7. Mixed Media Art
Combine leaf rubbings with other art supplies: glitter glue, torn paper collages, or metallic pens. This is especially fun for older kids who want to elevate their designs.

Tips for Success
- Choose the right leaves – Thicker, veiny leaves work best. Smooth leaves without texture won’t show much detail.
- Hold the paper still – Use tape to secure the paper if kids are having trouble keeping it in place.
- Try different surfaces – Experiment with rubbing on construction paper, kraft paper, or cardstock.
- Use bold colors – Darker crayons (like navy, black, or deep red) often show the most detail.
- Layer for depth – Encourage kids to overlap leaves and colors to make their art more dynamic.
a must-TRY family project
In a world full of screens, it feels refreshing to sit down with just paper, crayons, and a few leaves.
Leaf rubbing art proves that creativity doesn’t have to be complicated—or costly.
It’s a simple craft families have enjoyed for generations, and it’s still just as fun today.
So next time you head outdoors, collect a few leaves and give it a try.
Kids of all ages will enjoy seeing the patterns appear, and they’ll walk away proud of what they’ve made.
Sometimes the simplest crafts make the most lasting memories.
Want more kids' activities?
PIN THIS!

MORE POSTS YOU'LL LOVE

This post may contain affiliate links, which means I'll receive a small commission if you purchase through my link. Read the full disclosure.


